

Restoring old windows can be a rewarding DIY project that enhances the charm and functionality of your home. Whether you’re preserving historic wooden frames or simply reviving worn-out windows, this guide will walk you through the process. Let’s dive into why restoration is a better choice, the safety measures you need, and a detailed step-by-step process to bring your windows back to life.
Why You Should Restore Your Old Windows
Restoring old windows offers numerous benefits, both practical and aesthetic. Unlike replacing windows, restoration allows you to preserve the original character of your home. Historic windows, especially those made of wood, often feature craftsmanship and materials that are hard to replicate today. By restoring them, you maintain the architectural integrity of your property.
From an environmental perspective, restoration is a sustainable choice. Disposing of old windows contributes to landfill waste, while manufacturing new ones consumes significant resources. By opting for restoration, you reduce your carbon footprint and extend the life of your existing materials. Additionally, restored windows can be just as energy-efficient as new ones when properly sealed and insulated.
Essential Safety Measures for Window Restoration
Before starting your DIY window restoration project, it’s crucial to prioritize safety. Many old windows, especially those installed before 1978, may contain lead-based paint. Exposure to lead can be hazardous, so take the necessary precautions.
Always wear personal protective equipment (PPE), including gloves, safety goggles, and a respirator mask. Ensure your workspace is well-ventilated and free from distractions. If you suspect lead paint, use a lead test kit to confirm its presence. Follow the Environmental Protection Agency (EPA) guidelines for safe removal and disposal of lead-based materials. Taking these steps will protect both you and your environment during the restoration process.
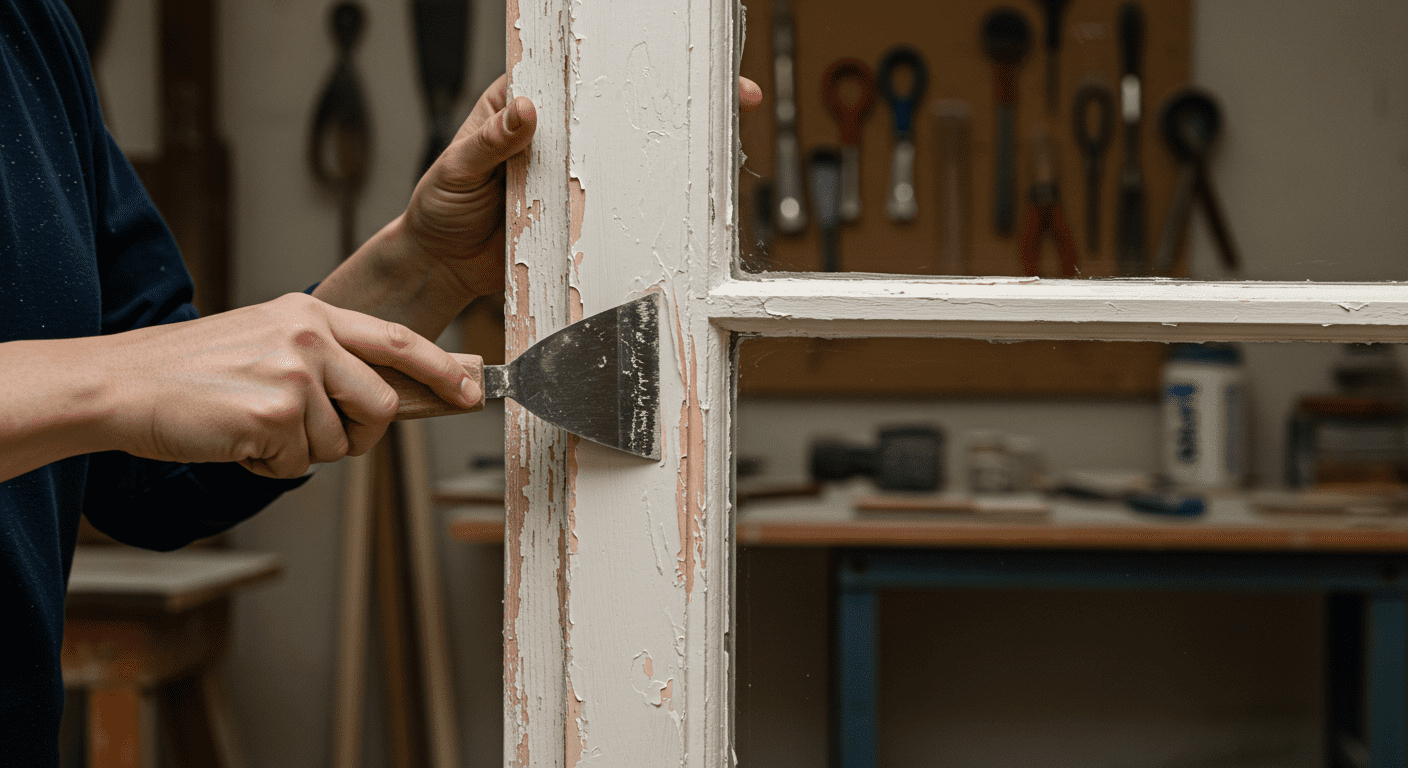
Step-by-Step Window Restoration Process
Assessing the Condition of Your Windows
Begin by evaluating the state of your windows. Look for signs of rot, cracks, or peeling paint. Check the glass for chips or cracks and inspect the frame for structural integrity. This assessment will help you determine the extent of repairs needed and the tools required.
Removing Glass and Stripping Old Paint
Carefully remove the glass panes to avoid damage. Use a putty knife or scraper to strip away old paint and glazing. This step is essential for achieving a smooth surface for repairs and repainting. Be patient, as rushing this process can lead to mistakes or damage.
Repairing Damage and Sanding the Frame
Address any damage to the wooden frame by filling cracks or holes with wood filler. Once the filler has dried, sand the frame to create a smooth surface. This step ensures that the primer and paint adhere properly, resulting in a polished finish.
Priming and Painting Your Windows
Apply a high-quality primer to the frame to protect it from moisture and improve paint adhesion. Once the primer has dried, paint the frame with a durable, weather-resistant paint. Choose a color that complements your home’s exterior for a cohesive look.
Reinstalling Glass Securely
After the paint has dried, reinstall the glass panes. Use glazing putty to secure the glass and create a tight seal. This step not only enhances the window’s appearance but also improves its energy efficiency by preventing drafts.
Tips for Successful Window Restoration
Recommended Tools and Materials
Invest in high-quality tools and materials to ensure a successful restoration. Essential items include a paint scraper, sandpaper, wood filler, primer, paint, and glazing putty. Having the right tools on hand will make the process smoother and more efficient.
Common Mistakes to Avoid
Avoid common pitfalls such as rushing through the preparation stages or using low-quality materials. Skipping steps like sanding or priming can lead to a subpar finish and reduced durability. Take your time and follow each step meticulously for the best results.
Cost Considerations and Budgeting for Your Project
Restoring windows can be cost-effective compared to replacement, but it’s essential to budget for tools, materials, and potential repairs. Plan ahead to avoid unexpected expenses and ensure you have everything you need to complete the project.
For more insights on enhancing your home’s energy efficiency, check out Top Window Sealing Services in Mission, TX.
Restoring your windows is a fulfilling DIY project that combines craftsmanship with sustainability. By following this guide, you can revive your historic windows, enhance your home’s charm, and contribute to a greener planet. Take your time, prioritize safety, and enjoy the process of bringing your windows back to life.


