

Sash windows are a timeless feature in many homes, admired for their classic design and functionality. However, over time, these windows can develop issues that compromise their performance and aesthetics. If you’re dealing with sticking sashes, broken cords, or drafty windows, this guide will walk you through the process of repairing them yourself. With the right tools, materials, and know-how, you can restore your sash windows to their former glory.
Understanding Sash Windows
Types of Sash Windows
Sash windows come in various styles, each with its unique characteristics. The most common types include single-hung, double-hung, and horizontal slider windows. Single-hung windows have one movable sash, while double-hung windows allow both sashes to move. Horizontal sliders, on the other hand, operate side-to-side rather than up and down. Understanding the type of sash window you have is crucial for determining the appropriate repair approach.
Common Issues with Sash Windows
Sash windows, while charming, are prone to several common problems. Broken sash cords can render the window inoperable, while drafts can lead to energy inefficiency. Wood rot, often caused by prolonged exposure to moisture, can weaken the frame and compromise the window’s structural integrity. Additionally, sashes may stick due to paint buildup or warped wood, making them difficult to open and close. Identifying these issues early on can save you time and effort during the repair process.
Essential Tools and Materials for Sash Window Repair
Tools You’ll Need
Before starting your DIY sash window repair, gather the necessary tools. These include a hammer, chisel, screwdriver, putty knife, and a utility knife. A paint scraper and sandpaper will come in handy for removing old paint and smoothing surfaces. Additionally, a sash cord replacement kit and a glazing tool are essential for addressing specific repairs.
Materials Required
The materials you’ll need depend on the issues you’re tackling. For wood rot, epoxy or wood filler is essential. Replacement sash cords, weatherstripping, and glazing putty are also commonly required. Don’t forget safety gear, such as gloves and goggles, especially if you’re dealing with old paint that may contain lead. Having all materials on hand ensures a smoother repair process.
Step-by-Step DIY Sash Window Repair Process
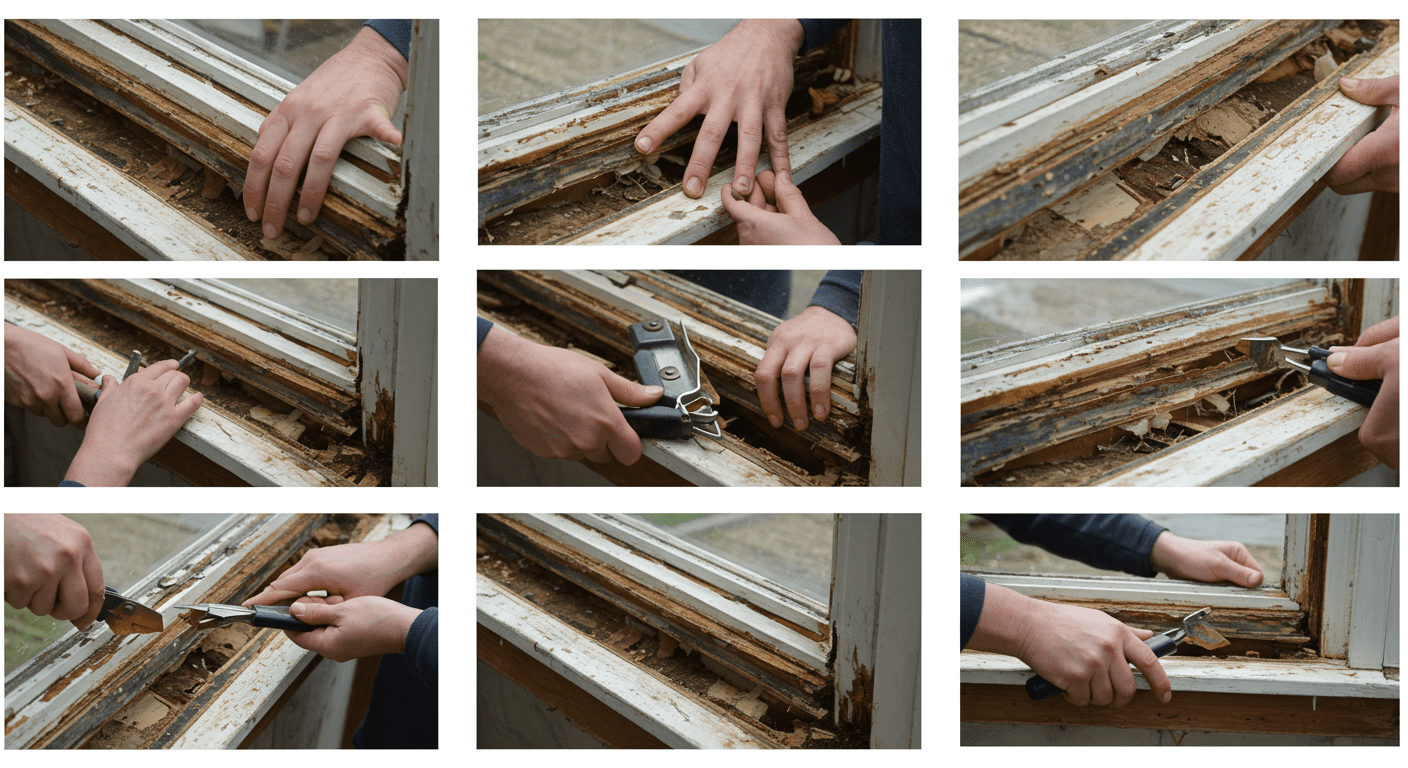
Removing the Sash
The first step in repairing a sash window is removing the sash. Start by carefully prying off the window stops with a putty knife or chisel. Be gentle to avoid damaging the wood. Once the stops are removed, you can slide the sash out of the frame. If your window has sash cords, cut them carefully and tie them off to prevent them from retracting into the frame.
Repairing the Sash
Once the sash is removed, inspect it for damage. For wood rot, use a chisel to remove the affected area and fill it with epoxy or wood filler. If the glass is cracked or broken, carefully remove the old glazing and replace the glass. Secure the new glass with glazing points and apply fresh glazing putty for a polished finish. Sand down any rough edges and repaint or stain the sash to match the original design.
Reinstalling the Sash
Reinstalling the sash is the final step in the repair process. Start by attaching new sash cords to the weights and threading them through the pulleys. Secure the cords to the sash and carefully place it back into the frame. Reattach the window stops, ensuring they are snug but not too tight, to allow smooth operation. Test the window to ensure it opens and closes effortlessly.
Troubleshooting and Maintenance Tips
Common Problems and Solutions
Even after repairs, sash windows may occasionally present issues. If the sash sticks, check for paint buildup and sand down the affected areas. Drafts can often be resolved by adding weatherstripping or adjusting the window stops. For persistent problems, consider consulting a professional to ensure the window is properly aligned and sealed.
Preventive Maintenance
Regular maintenance is key to prolonging the life of your sash windows. Keep the tracks clean and free of debris, and lubricate the pulleys periodically to ensure smooth operation. Inspect the windows for signs of wear and address minor issues promptly to prevent them from escalating. By incorporating these practices into your routine, you can enjoy the beauty and functionality of your sash windows for years to come.
Repairing sash windows may seem daunting at first, but with the right guidance, it’s a manageable and rewarding DIY project. Not only will you save money, but you’ll also gain the satisfaction of restoring a piece of your home’s history. Whether you’re dealing with broken cords, wood rot, or drafts, this guide provides all the information you need to tackle the task with confidence. For more expert advice on window repair and maintenance, check out Top-Rated Double Pane Window Glass Repair Services in Lewisville, TX – Fast & Affordable Solutions or Expert Window Repair, Replacement & Installation Services in Hurst, TX – Quality You Can Trust.
SEO Enhancements
Internal Links
- For more information on window maintenance, visit our Window Maintenance Tips.
- Check out our guide on How to Choose the Right Window Repair Service.
External Links
- Learn more about lead paint safety from the EPA.
- Find out more about wood rot prevention from Wood Magazine.


